Enhance Your Culinary Creations with the Ultimate Chocolate Aerator

2024/12/04
Enhance Your Culinary Creations with the Ultimate Chocolate Aerator
In the world of culinary arts, the quest for perfect texture and flavor is an ongoing journey. One tool that has revolutionized chocolate preparation is the chocolate aerator. This innovative device allows chefs and home bakers alike to create remarkably airy and flavorful chocolate desserts that elevate their culinary creations to new heights. In this article, we will explore the numerous benefits of using a chocolate aerator, how it works, and practical tips for incorporating it into your recipes.
Table of Contents
- What is a Chocolate Aerator?
- How Does a Chocolate Aerator Work?
- Benefits of Using a Chocolate Aerator
- Different Types of Chocolate Aerators
- How to Use a Chocolate Aerator
- Choosing the Right Chocolate Aerator for Your Needs
- Creative Ways to Use Chocolate Aerators in Your Recipes
- Cleaning and Maintenance of Your Chocolate Aerator
- Frequently Asked Questions
- Conclusion
What is a Chocolate Aerator?
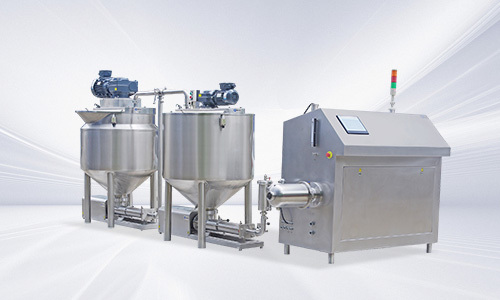
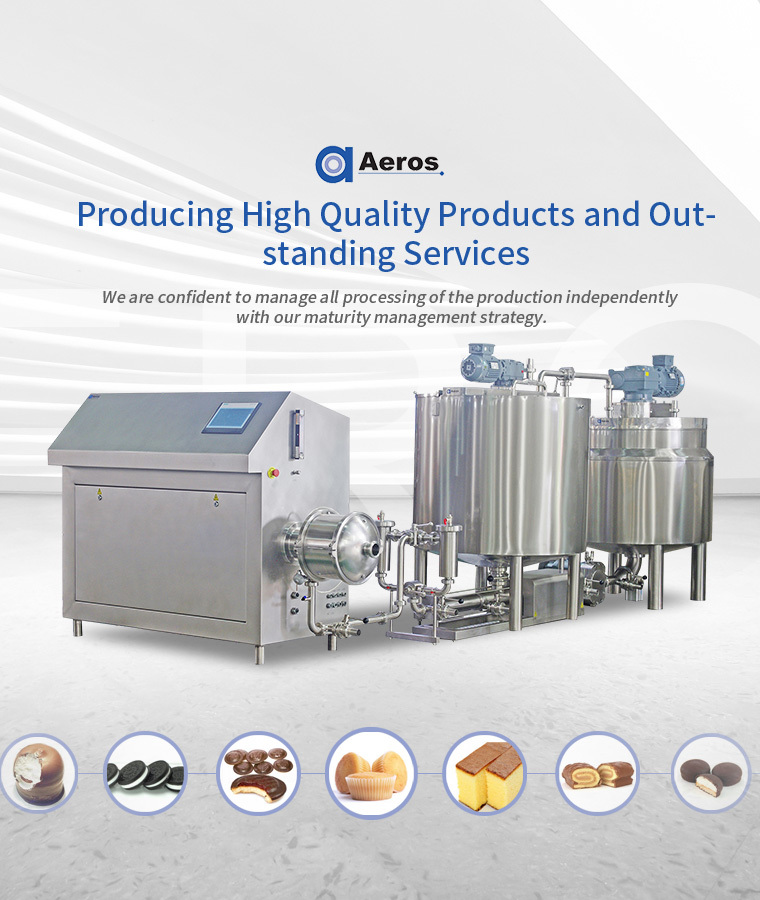
A chocolate aerator is a specialized kitchen tool designed to incorporate air into melted chocolate, creating a light and fluffy texture. By introducing air bubbles into the chocolate mixture, it results in a unique consistency that is ideal for mousses, ganaches, and other desserts. This device is particularly useful for chefs aiming to achieve professional-quality results in their baking endeavors.
Understanding the Science Behind Aeration
The process of aeration involves the incorporation of air into a substance, influencing its volume and texture. In chocolate, aeration alters the mouthfeel, making it lighter and creamier. By utilizing a chocolate aerator, you can achieve the perfect balance between rich chocolate flavor and airy texture, which is essential for elevating your dessert presentations.
How Does a Chocolate Aerator Work?
A chocolate aerator employs a combination of mechanical action and pressure to introduce air into melted chocolate. The device often features a motorized whisk or paddle that vigorously mixes the chocolate while simultaneously pulling in air. As the mixture is agitated, tiny air bubbles form within the chocolate, resulting in a fluffy, mousse-like consistency that retains the rich flavor of chocolate.
Key Components of a Chocolate Aerator
1. **Motorized Whisk or Paddle:** The heart of the aerator, responsible for mixing the chocolate and incorporating air.
2. **Temperature Control:** Many models come with adjustable temperature settings to ensure the chocolate is melted to the ideal consistency.
3. **Safety Features:** Automatic shut-off and overload protection ensure safe operation during use.
Benefits of Using a Chocolate Aerator
Using a chocolate aerator offers several compelling advantages, making it an essential tool for both professional chefs and enthusiastic home bakers.
1. Enhanced Texture and Flavor
A chocolate aerator allows you to achieve a light, airy texture while preserving the rich flavor of chocolate. This is particularly useful for creating decadent mousses, soufflés, and ganaches.
2. Time Efficiency
Mixing chocolate by hand can be time-consuming and labor-intensive. A chocolate aerator speeds up this process, allowing you to prepare your desserts more quickly and efficiently.
3. Consistency in Results
With a chocolate aerator, you can achieve consistent results every time. This is crucial in professional settings where presentation and texture are key to customer satisfaction.
4. Versatility
A chocolate aerator is not limited to chocolate alone. It can also be used to aerate other ingredients like creams, purees, and even sauces, enhancing their texture and flavor.
Different Types of Chocolate Aerators
When selecting a chocolate aerator, it’s important to understand the different types available. Each type serves specific needs and preferences.
1. Electric Chocolate Aerators
Electric chocolate aerators are powered by motors and offer adjustable speed settings for optimal mixing. These are ideal for those who require consistent and efficient aeration.
2. Manual Chocolate Aerators
Manual aerators are less common but can provide a great workout while allowing for more control over the aeration process. They often require more time and effort but can be rewarding for those who enjoy hands-on cooking.
3. Handheld Aerators
These compact devices are portable and perfect for small batches. They’re an excellent choice for home cooks who want to experiment with aeration without committing to a larger machine.
How to Use a Chocolate Aerator
Using a chocolate aerator is a simple process that can be broken down into a few easy steps. Follow our guide to achieve the best results.
Step-by-Step Instructions
1. **Melt the Chocolate:** Begin by melting your chocolate using a double boiler or microwave. Ensure the chocolate is smooth and free from lumps.
2. **Pour into the Aerator:** Once melted, pour the chocolate into the aerator's mixing bowl. Avoid overfilling to allow for expansion during aeration.
3. **Start Aerating:** Turn on the aerator and select the desired speed. Allow it to mix for the recommended time, typically between 2-5 minutes.
4. **Check Consistency:** Pause the aerator and check the texture. Continue aerating if a lighter consistency is desired.
5. **Use Immediately or Store:** Once aerated, use the chocolate in your desired recipe or store it in an airtight container for later use.
Choosing the Right Chocolate Aerator for Your Needs
Selecting the right chocolate aerator depends on several factors, including your cooking style and frequency of use. Consider the following points when making your choice:
1. Frequency of Use
If you plan to use the aerator frequently, investing in a high-quality electric model may be worthwhile for efficiency and durability.
2. Batch Size
Consider the size of the batches you typically prepare. Larger machines are suited for professional environments, while smaller handheld models are great for home use.
3. Budget
Aerators come in various price ranges. Determine your budget and look for models that offer the best value without compromising on quality.
Creative Ways to Use Chocolate Aerators in Your Recipes
Once you have a chocolate aerator, the possibilities are endless! Here are some innovative ways to use it in your culinary creations:
1. Chocolate Mousse
Prepare a light and airy chocolate mousse that melts in your mouth. Use the aerator to achieve the perfect consistency, combining chocolate, cream, and whipped egg whites.
2. Ganaches and Fillings
Create smooth, velvety ganaches for cakes, truffles, and pastries. The aerator ensures a silky texture that enhances the overall flavor profile.
3. Chocolate Soufflés
For an impressive dessert, use the aerator to whip chocolate soufflé batter. The added air will contribute to a beautifully risen soufflé.
4. Chocolate Whipped Cream
Elevate your desserts with chocolate whipped cream. The aerator can quickly whip cream and chocolate together for a luscious topping.
5. Infused Chocolate
Experiment with flavors by infusing melted chocolate with herbs, spices, or fruit extracts. The aerator helps to evenly distribute these flavors while maintaining the delightful texture.
Cleaning and Maintenance of Your Chocolate Aerator
Proper care and maintenance are crucial for prolonging the lifespan of your chocolate aerator. Here are some cleaning tips:
1. Disassemble the Parts
Before cleaning, ensure the aerator is unplugged. Remove any detachable parts, such as the whisk or mixing bowl, for thorough cleaning.
2. Hand Wash or Dishwasher Safe
Check the manufacturer's instructions for cleaning recommendations. Many parts can be hand-washed with warm, soapy water, while others may be dishwasher safe.
3. Dry Completely
Ensure all parts are completely dry before reassembling them to prevent any moisture damage to the motor or electrical components.
4. Regular Maintenance
Periodically inspect your aerator for wear and tear. Regular maintenance will keep it functioning optimally and prolong its lifespan.
Frequently Asked Questions
1. Can I use a chocolate aerator with any type of chocolate?
Yes, you can use a chocolate aerator with various types of chocolate, including dark, milk, and white chocolate. Just ensure the chocolate is melted before using the aerator.
2. How long does it take to aerate chocolate?
The aeration process typically takes between 2-5 minutes, depending on the desired texture. Monitor the consistency closely to achieve the best results.
3. Can I aerate chocolate without a chocolate aerator?
While it’s possible to aerate chocolate by hand using a whisk, it requires significant effort and may not yield the same light texture as an aerator.
4. Is it difficult to clean a chocolate aerator?
No, cleaning a chocolate aerator is relatively straightforward. Following the manufacturer's instructions will simplify the process and keep it in good condition.
5. What recipes work best with aerated chocolate?
Aerated chocolate is ideal for recipes such as mousses, soufflés, ganaches, and whipped fillings. The light texture enhances the overall quality of these desserts.
Conclusion
Incorporating a chocolate aerator into your culinary toolkit can significantly enhance your chocolate creations. By understanding how to use this innovative device and exploring its various applications, you can elevate your baking and dessert-making skills. With the ability to create light, airy textures and rich flavors, the chocolate aerator is a game-changer for both professional chefs and home bakers alike. So go ahead—experiment, create, and delight your guests with exquisite chocolate desserts that leave a lasting impression!
Chocolate aerator


